Saturday, April 24, 2010

Linda's Butterfly Quilt

Our next mystery quilt from our lucky dip is Linda's. I will be sending out instructions with the fabric soon but there are few tricks I thought might be better put in the blog.

Here are the pieces you will need to cut. When you start assembling the pieces of the block there is a small triangle E to add to the corners of B (the butterflies). It is really easy to get this crooked so here is a tip.


  • Place the butterfly square on your board to line up with the inch grid and the diagonal line. 
  • Draw a diagonal line on the butterflies making a two inch triangle.
  • Place the small triangle of E right side down to line up with the inch grid then mark in a diagonal line on this triangle following the diagonal line on the board.
Now place the small triangle to line up with the line you have drawn on the butterflies. Check that it is centred by lining up the diagonal line you have drawn on the small triangle with the diagonal line on the board.

There is a link on the right to a video on sewing half-square triangles.

Even though the measurements I have give are generous my finished block ended up exactly the right size without trimming. If you are worried then make your measurements even more generous but make sure you match points and joins in your final block.

The instructions can be accessed from Google Docs.

Thursday, April 15, 2010

Freezer Paper Applique


At our last quilting weekend Robyn brought along one of her quilts to show us where she has used Freezer Paper Appliqué. She then gave us a demonstration so here are her instructions.

1.Trace shape on dull side of freezer paper.


2. Cut out the shape on the traced line.


3. Iron shiny side to wrong side of fabric with a dry iron, allowing ¼ in around shape. It is easier to turn seam allowance if as much of the shape is on the bias as possible. Freezer paper will peel off easily if you make a mistake and can be repositioned and ironed again.


4. Cut around shape including the ¼ in seam allowance. 
5. Snip to within a couple of threads at inside points E.g. inside point of a  heart shape.
6. At outside points trim fabric off to almost the paper and turn sides over. These may also need a little trimming if point is too bulky. E.g. leaf points.

7. Press seam allowance to inside or you can fold as you sew.


8. Pin appliqué to base fabric. If appliqué is large it is better to baste it. If appliqué is very small peel the paper off before stitching.

9. If possible start stitching on a straight edge. Use thread matching the appliqué fabric. Bring thread up from wrong side of base fabric catching a thread of the appliqué under the edge so that it will be unseen.
10. Continue stitching leaving a small gap so that paper can be removed with tweezers. Stitch gap closed.
11. If appliqué is large it is better to completely sew it in place and then make a small hole in base fabric through which to remove paper.
12. It is possible to reuse a freezer paper template several times if you manage not to mangle it in the above process. 

Our previous lesson from Robyn was fusible webbing appliqué.

There are quite a few video web tutorials. I have linked to a few here:

Sunday, April 11, 2010

April Quilting Weekend

What a great weekend we have had! We finished Marion's Sickle quilt and I will be delivering it to Bezzina House on Tuesday this week together with Patricia's quilt that we finished a few months ago.

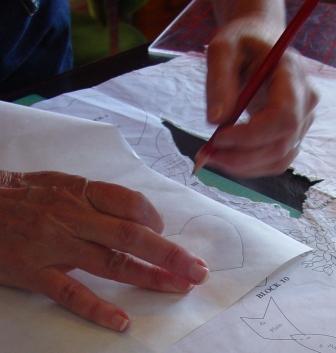
 Jane brought along an antique quilt she had recently bought. It looks and feels fantastic and is made entirely of medallions without any backing so it is see through. It drapes so beautifully. Robyn brought along a lesson in using freezer paper for appliqué. I will put up some instructions for that in the near future.

  
Evelyn made a patchwork birthday cake for me. Such fun! Thank you Evelyn.

Of course as per usual we enjoyed lots of food together and after dinner on Saturday night some of us stayed up long enough to watch a DVD - 'Julie and Julia'. Jane came down from Toowoomba and stayed over for Saturday night.

Our first task on Saturday morning was to bind Marion's quilt to finish it off. This job is always done quickly with a crowd of people around the table chatting as they go.

Liz (from NZ) was our newest member this time and used the treadle machine to work on a quilt she was making. Liz was really excited to receive a text to say her new grandson Callum was born today.

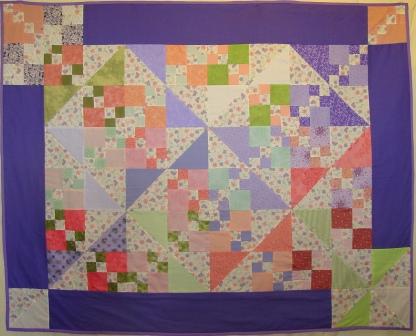
Our biggest project for the weekend was the Soft Blue Sampler. We progressed from this...

 To this...

  
Next time we meet we will be backing, binding and finishing this one off. It is actually looking so stunning that we might even raffle it rather than donate it to Bezzina House. We have two spare blocks and will make matching cushions from those to go with the quilt.

Great work ladies, we are really achieving quite a lot in our global quilting group.